The most effective way to produce a shaded relief is probably a combination of analytical shading and retouching with graphical software. The first step is rendering a shaded relief from a DEM using specialized software. The second step is enhancing the shaded relief with Photoshop (or other raster graphics software).
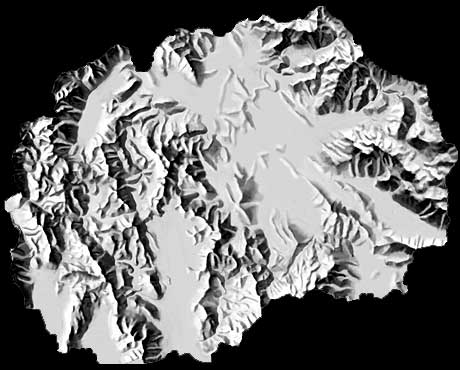
Macedonia, scale 1:750,000 © State Statistical Office of the Republic of Macedonia and Swiss Federal Statistical Office.
Shaded relief generated from digital elevation models usually does not match the quality of manually-produced relief. Among the deficiencies of analytical relief, important topographic features are not depicted clearly enough. However, analytical shaded relief can serve as a starting point for graphical enhancements with Photoshop.
The four images below illustrate the workflow with a portion of the hill shading of Macedonia shown above.
- The first relief originates from a too detailed DEM. The completely unrecognisable large landforms make this shaded relief unusable.
- Using a filtered (downsampled) DEM, an alternative shading was generated using specialized software (Shadow) that allows for interactive adjustment of the light direction and simulation of aerial perspective.
- Additional improvements to the shading in Photoshop resulted from using the imported contour lines, spot heights, drainages and political boundaries as reference guides.
- After making tonality adjustments, combining the shading with thematic map layers yielded the final map.
1) Shaded relief of Macedonia without local adaptations or filtering.
2) Shaded relief after DEM filtering and local adjustments in Shadow (relief shading software).

3) Shaded relief after corrections in Photoshop.
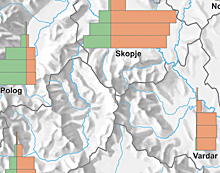
4) Tonal lightening for the final print.
Producing the shaded relief of Macedonia took four days: One day for converting and importing the different data sets, one day for the analytical shading with Shadow, and two days for enhancing the relief with Photoshop.
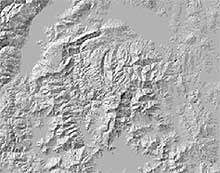
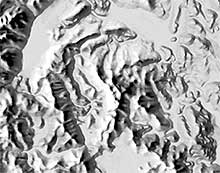
The following two images show the detailed work done with Photoshop. Data artefacts embedded in the DEM result in unsightly terraces and ridges (left). After a few strokes with Photoshop’s image editing tools, the artefacts disappeared and the major landforms became much easier to distinguish (right). The dodge, burn, clone stamp and brush tools proved to be especially useful for this work.
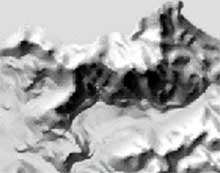
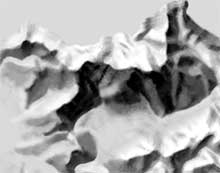
Before (left) and after (right) enhancements with Photoshop.